

How To Clean Inside Of Bathroom Fan
How To Clean a Bathroom Frazzle Fan
Here'due south the plan — don't neglect the fan.
![]() Time
Time
An hour or less
![]() Complexity
Complexity
Beginner
![]() Cost
Cost
Less than $20
Introduction
That little fan in the celling is more of import than you lot might think. It helps get rid of odors, airborne contaminants and moisture in the air. A fan covered in dust doesn't piece of work efficiently, eventually leading to mold, mildew and possibly a house fire. Give information technology a good cleaning about every half-dozen months. Read on to discover out how to make clean your bathroom frazzle fan.
Tools Required
Materials Required
- Microfiber towel
Project step-by-step (5)
Step 1
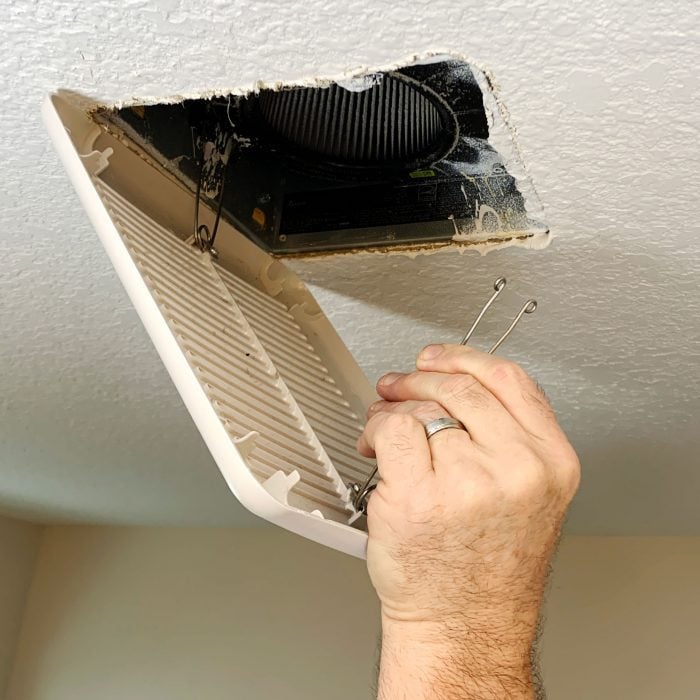
Remove the Vent Cover
- First, be certain the ability is turned off to the fan. To be actress safe, plow off the circuit at the breaker box.
- If it's just a vent with no lite, remove the vent cover by gently pulling downwards on information technology, then squeezing the metal mounting wires together on both sides. Slide them out of their slots, removing them from the fan housing.
- If your vent cover has a light, disconnect the wire first. Press the release tab on the connector before removing the cover.
Stride two
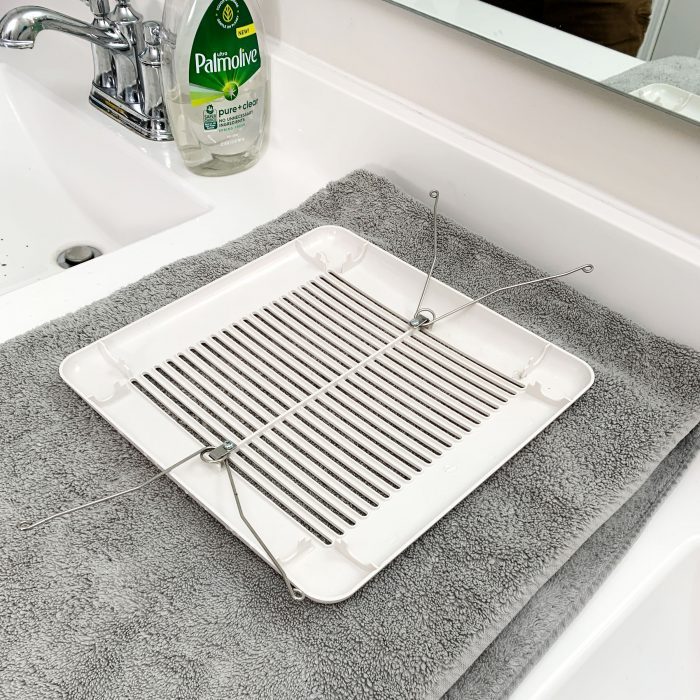
Make clean the Vent Cover
- Cleaning a cover without a light is unproblematic. Fill your bath sink with warm water and a few drops of dish soap. Soak the cover in the soapy h2o for a few minutes, then scrub it with a cloth or brush. Place the cover on a towel and let it air dry while you motion on to the adjacent footstep — cleaning the fan.
- If your fan cover has a light, do not submerge it in water . Simply vacuum off the grit, wipe it clean with a damp material, then air dry.
![]()
Step 3
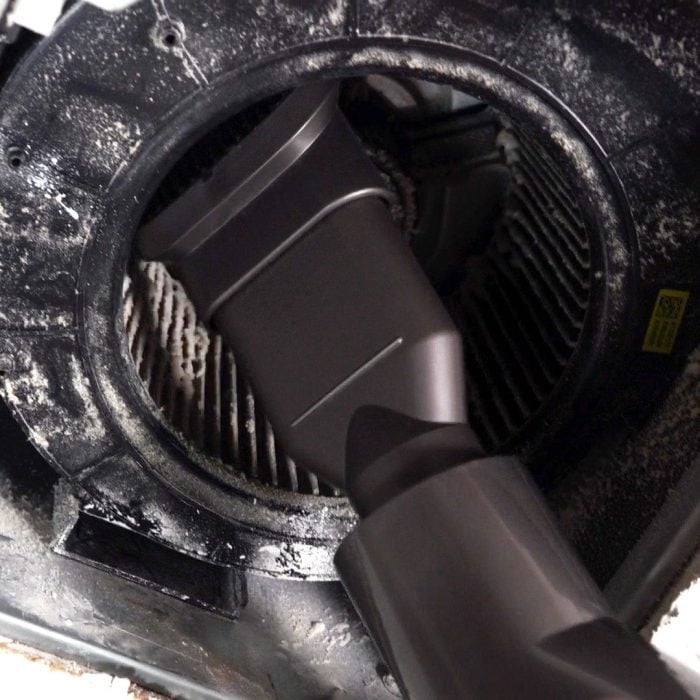
Make clean the Fan Without Removing the Motor
- Apply a vacuum with a crevice attachment to remove most of the dust. And so switch to a brush attachment for the fan motor components and fan housing. Maintain a light touch so you don't damage anything.
- Once y'all remove the dry dust, take a damp microfiber textile and wipe down the fan components and housing. This should remove any remaining dirt.
Step iv
Remove the Motor for Deep Cleaning
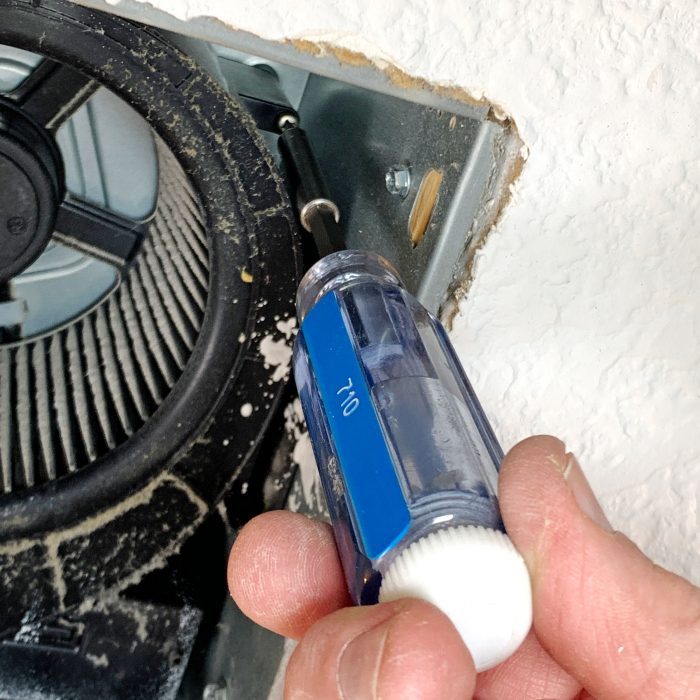
- Don't be afraid to further disassemble the fan. Depending on your make and model, but two or iii screws hold the fan motor in the housing. (A magnetic tip screwdriver works well for this.)
- To remove the fan motor, begin by unplugging the connector or plug that powers the fan.
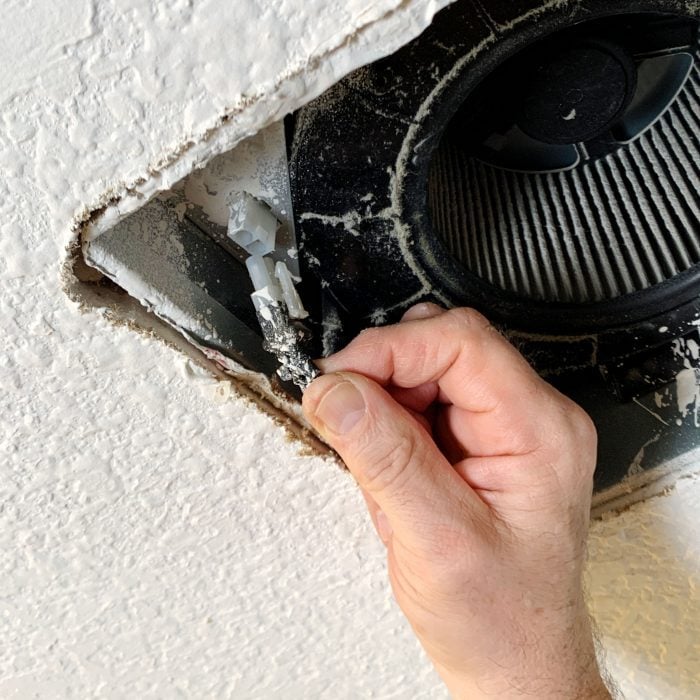
- Next, remove the mounting screws that agree the motor to the housing. Recollect to hold the motor with ane hand while removing the last screw, then lower the motor from the housing.
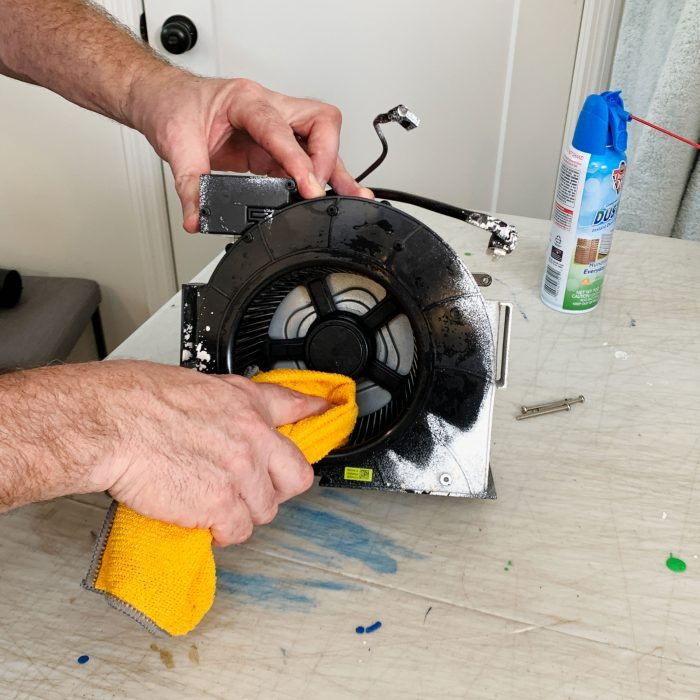
- Vacuum the motor and/or have information technology outside and blow the grit from the motor and fan blades with forced air. A small, soft bristle brush works well to remove caked-on dust.

- Give the motor, fan blades and fan housing a good wipe downwards with a damp microfiber fabric earlier re-installing the motor back in the housing.
Stride 5
Reassemble the Frazzle Fan
- With a make clean fan and a cover looking similar new, it'south fourth dimension to put the fan back together. If you removed the motor, your beginning step is to put information technology back in place and supercede the screws.
- Next, plug in the fan. Then put the cover back on by inserting the mounting wires back into their slots, so gently pushing the cover into place.

Originally Published: Jan twenty, 2022

Source: https://www.familyhandyman.com/project/how-to-clean-a-bathroom-exhaust-fan/
Posted by: yohowatiod1959.blogspot.com
0 Response to "How To Clean Inside Of Bathroom Fan"
Post a Comment